PyCharm IDE Plugin
caution
The PyCharm plugin is no longer supported.
Use the Cortex XSOAR extension for VSCode instead.
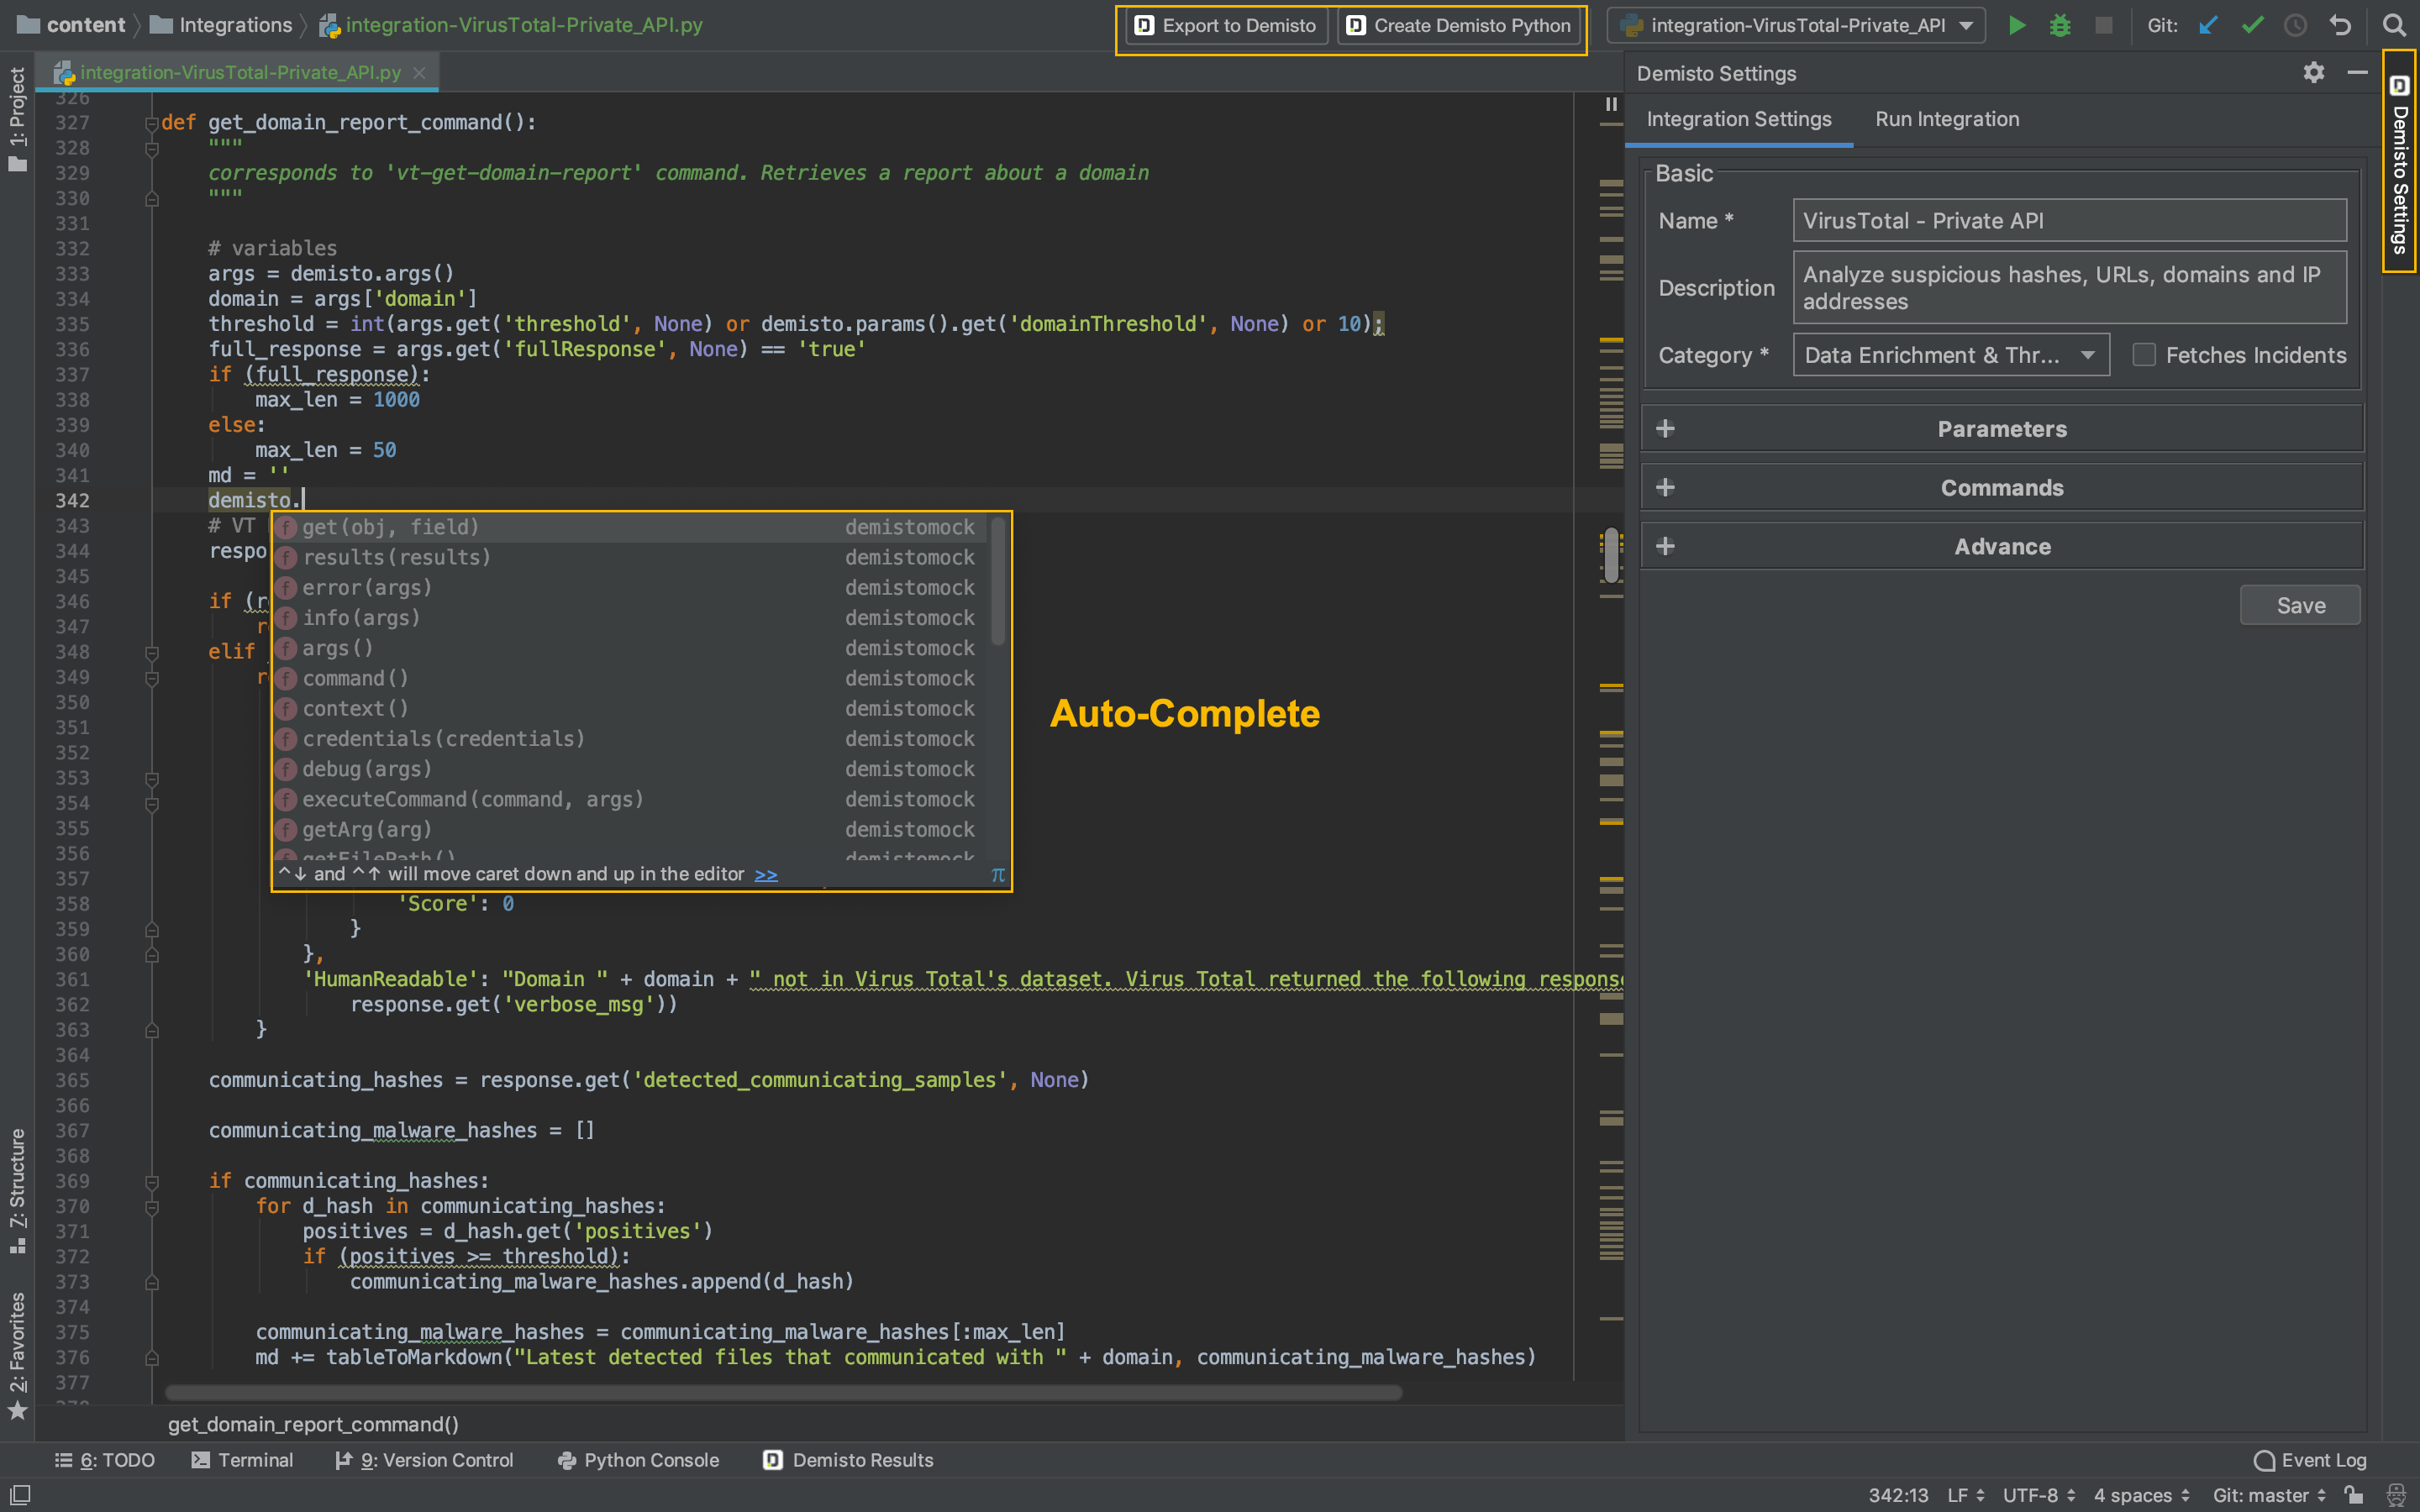
The Cortex XSOAR plugin for the PyCharm IDE enables you to design and author scripts and integrations for Cortex XSOAR directly from PyCharm. The plugin adds a sidebar with Automation and Integration Settings, just like the Settings sidebar in the Cortex XSOAR script editor. When writing code, the plugin provides you with auto-complete of Cortex XSOAR and Python functions.
Plugin Workflow#
The plugin defines a slightly different workflow than Cortex XSOAR. With the plugin, you can work on your Python code, and use the Cortex XSOAR Settings side toolbar to define all of the automation and integration parameters under the Automation Settings or Integration Settings tab, respectively.
You can run the script locally in PyCharm, or run it in Cortex XSOAR and have the results display in PyCharm.
Prerequisites#
- Server v4.1 or later
- PyCharm, or IntelliJ with Python Community Edition (Python plugin for IntelliJ) v2018.5 and later.
- Cortex XSOAR server
- Cortex XSOAR API key: To generate Cortex XSOAR API key follow these steps:
- Log in to your Cortex XSOAR instance.
- Go to Settings > Integrations > API Keys.
- Click Get Your Key.
- Enter a name for the API key, and click Generate key.
Install the PyCharm Plugin#
There are specific installation instructions depending on your PyCharm version.
PyCharm 18.2.x#
- From the top menu, click PyCharm > Preferences.
- Select Plugins > Browse Repositories.
- Search for "Demisto".
- When "Demisto Add-on for PyCharm" is located, click Install.
PyCharm 18.3 (and later)#
- From the top menu, click PyCharm > Preferences.
- Select Plugins > Marketplace.
- Search for "Demisto".
- When "Demisto Add-on for PyCharm" is located, click Install.
Configure Cortex XSOAR on PyCharm#
To interact with Cortex XSOAR while working in PyCharm, you need to enter several Cortex XSOAR instance parameters.
- Open the project you want to work on in PyCharm. For example,
Cortex XSOAR Contentrepository. - In PyCharm, click Preferences > Tools > Demisto Plugin Setup.
- (MacOS users) When prompted for access to your keychain, select Allow Always. This will avoid issues later on.
- Enter your Cortex XSOAR server URL and port, if necessary.
If you are working on a dev instance on localhost, use HTTP (not HTTPS), for example: (http://localhost:8080). - Enter your Cortex XSOAR API key.
- Optional: To test the configuration, click Test.
- Click Apply.
After you successfully configure the plugin, several files are automatically downloaded from your Cortex XSOAR instance and saved in your project's root directory. These files enable you to use the functions you defined in Cortex XSOAR and run the scripts locally in PyCharm.
CommonServerPythonCommonServerUserPythondemistomock(enables you to run the scripts locally in PyCharm)
Create a New Cortex XSOAR File#
- In the IDE project view, select the folder in which to save the new file.
- In the top navigation bar, click File, and select the file type to create.
- New Cortex XSOAR Automation
- New Cortex XSOAR Integration
- Enter a name for the file.
New Python and YML files are created. By default, the editor opens the new Python file. You're ready to start writing code.
Python Files#
You can create new Python files, or open existing Python files.
Create a Python file#
- Under the Cortex XSOAR Settings toolbar, you’ll have two buttons named
Create Cortex XSOAR Automation ConfigurationandCreate Cortex XSOAR Integration Configuration - Click the appropriate button. A new Cortex XSOAR YML file is created for this script, and you can now define arguments and other settings.
Edit an Existing Cortex XSOAR File#
You can't directly edit system integrations. To edit a system integration, change the id and name parameters in the YML file.
- In the top menu bar, click File >
Open Cortex XSOAR Configuration. - Select the file you want. (It should be a Cortex XSOAR YML)
- A Python script file would open, and you can edit the code and use
Cortex XSOAR Settingsto edit arguments etc. - Go to a Cortex XSOAR YML file (open it in through the IDE project view)
- Click the Create Cortex XSOAR Python button in the top actions toolbar.
. A Python script file would open, and you can edit the code and use
Cortex XSOAR Settingsto edit arguments etc.
Export a File to Cortex XSOAR#
When you run a script in PyCharm, the file is automatically exported to Cortex XSOAR. To manually export a file to Cortex XSOAR, click the Export to Cortex XSOAR button in the top actions toolbar.
Run an Integration or Automation in Cortex XSOAR#
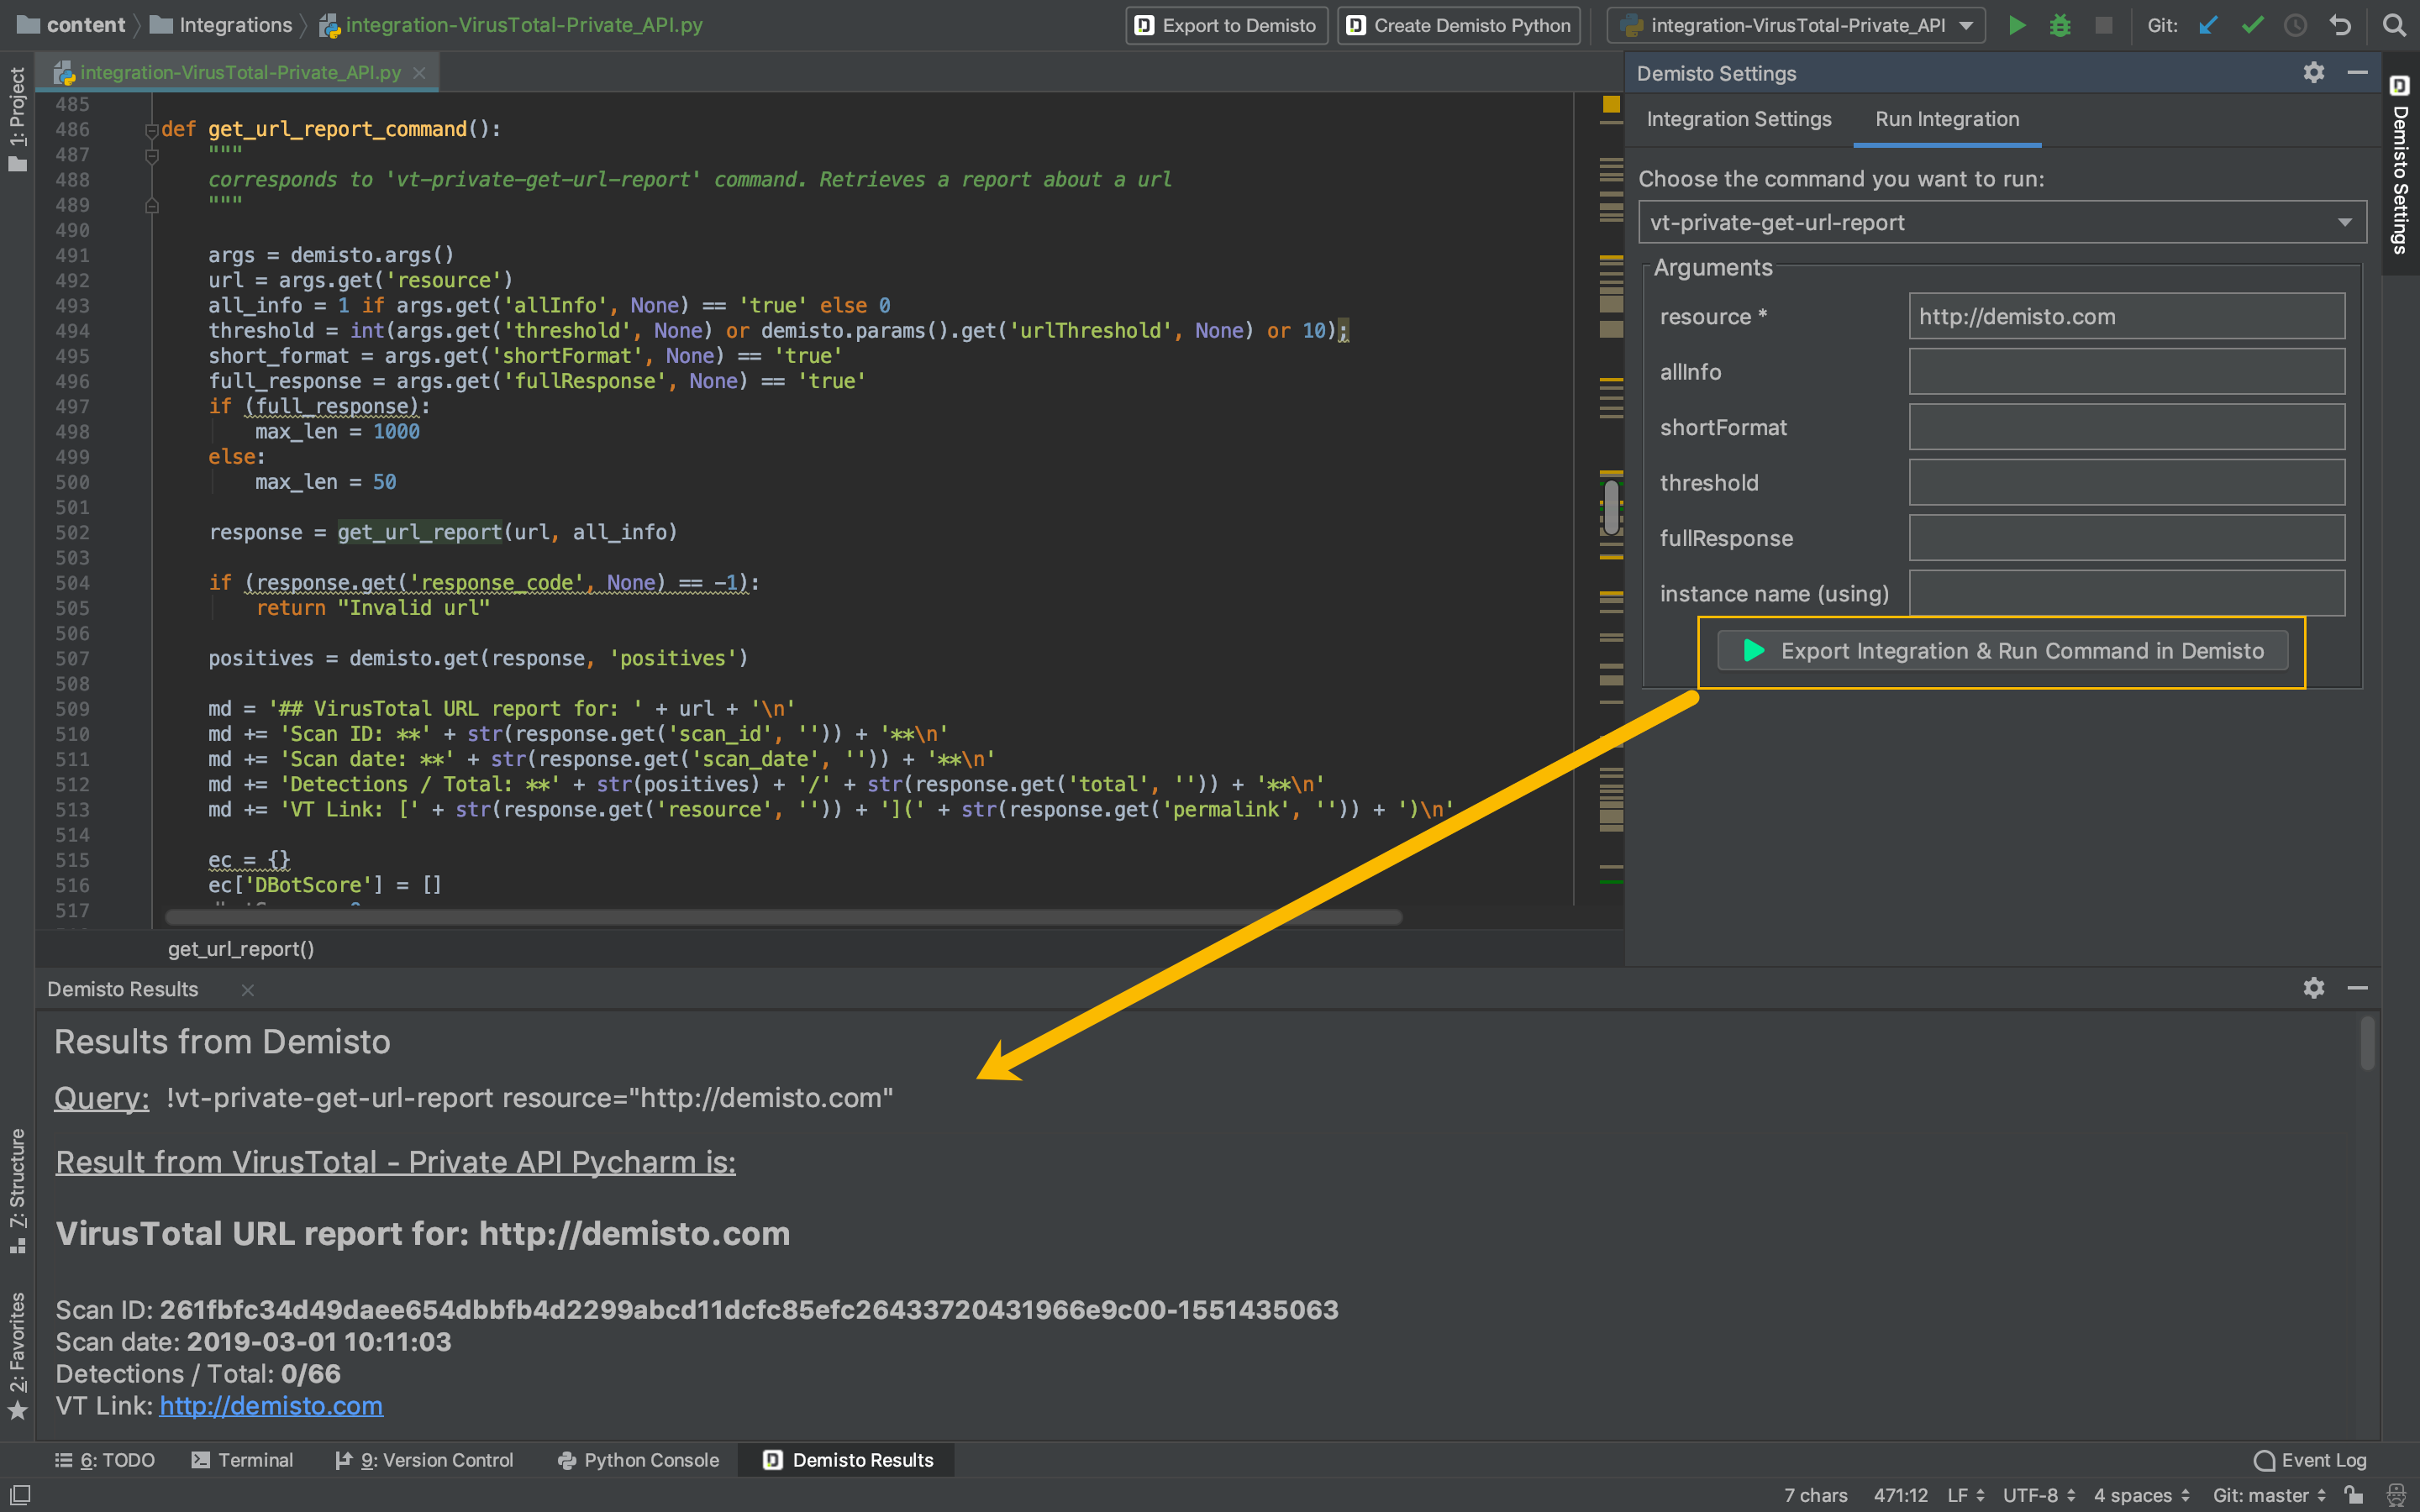
From PyCharm, you can run an integration or automation in Cortex XSOAR. When you want to run the script in Cortex XSOAR. The script will be uploaded to, and run in Cortex XSOAR, and the results will be displayed in the Cortex XSOAR Results toolbar in PyCharm.
To run an integration from PyCharm, you need an active Playground in Cortex XSOAR, otherwise an error is thrown in PyCharm. To create a Playground, from the Cortex XSOAR CLI run the /playground_create command.
- From the Cortex XSOAR Settings toolbar, select what to run.
- Run Automation
- Run Integration
- Enter the necessary arguments.
- Click Export and run in Cortex XSOAR.
Update Cortex XSOAR Mock Files#
In general, you do not need to update Cortex XSOAR mock files. When there is an important update to the mock files, we will announce it in the plugin release notes.
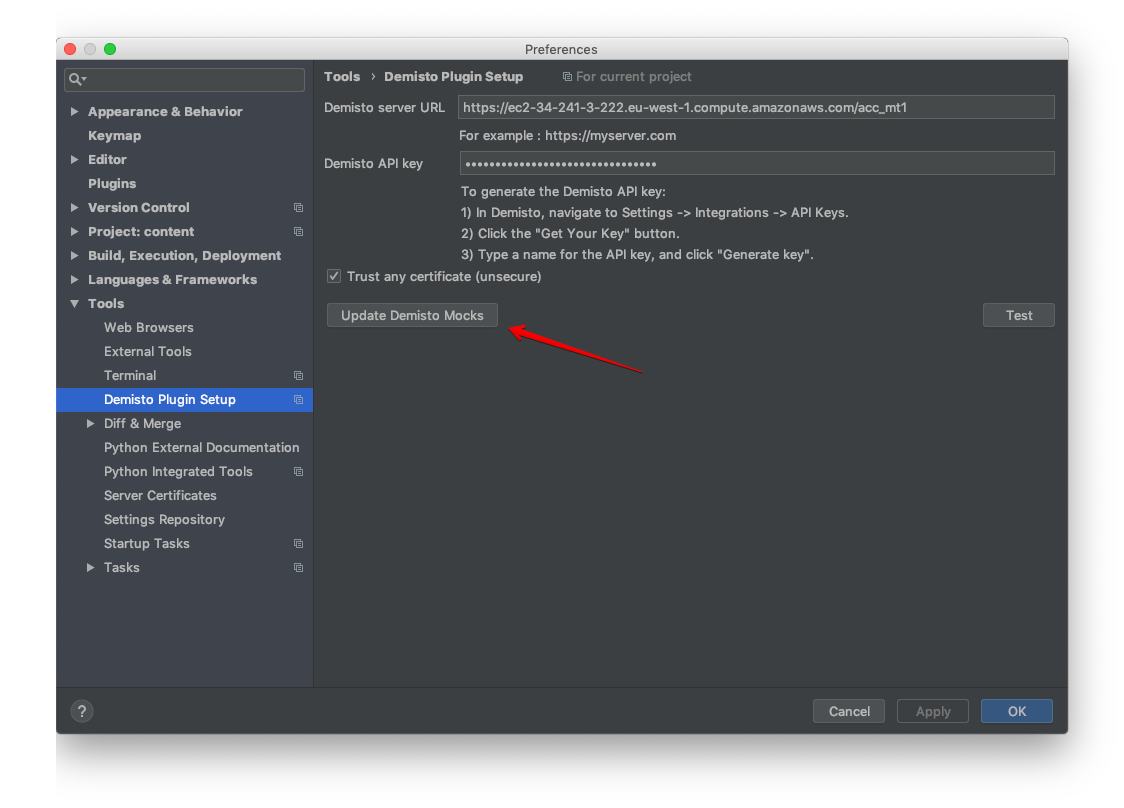
You might want to manually update the mock files after content updates, in which CommonPythonServer and CommonServerUserPython files are changed or updated. Manually updating the mock files updates the files in your local environment.
To update the Cortex XSOAR mock files, select Tools > Demisto Plugin Setup, and click Update Demisto Mocks.
Local Run/Local Debug (Advanced)#
Instead of running commands in Cortex XSOAR, you can run them locally in PyCharm. Every demisto action (demisto.___) is executed by mock files, and the code runs as a regular Python script.
Since the script is run as a regular Python file, you can debug the code by adding the relevant parameters in the `demistomock.py` file, which is located in your project's root. In most cases, you need to edit the return value for several functions.
| Function | Description | Example |
|---|---|---|
| command | Called for demisto.command() | return "my_command_name" |
| args | Called for demisto.args() | return { "myArg": "example"} |
| parameters | Called for demisto.params() | return { "api_key": "example"} |
Logs#
The logs include default PyCharm logs and plugin-specific logs. Logs are located under the idea.log file.
MacOS#
~/Library/Logs/
For example: ~/Library/Logs/PyCharmCE2018.2/idea.log Linux and Other Unix systems: ~/
Windows#
- Windows Vista, 7, 8, 10:
\Users<USER ACCOUNT NAME> - Windows XP:
\Documents and Settings<USER ACCOUNT NAME>
For example:c:\Users\John.PyCharm45\